I’ve been thinking about changing my curtain from the bathroom window, for days.
How is made, the curtain for the bathroom window?
Lately, I’m making a lot of changes in it. It’s always boring to see things in the same place … aren’t? If you follow me, I’ll explain how to make one.
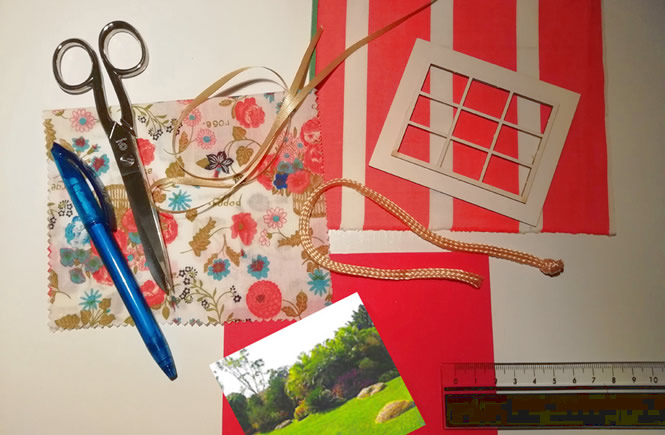
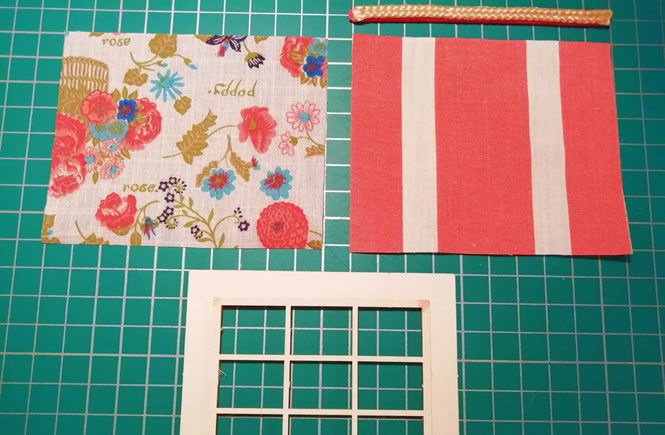
What materials do I need?
- A piece of stamped fabric
- and another in which a smooth color dominates
- foam sheet
- a flat cord
- a ribbon or very narrow cord
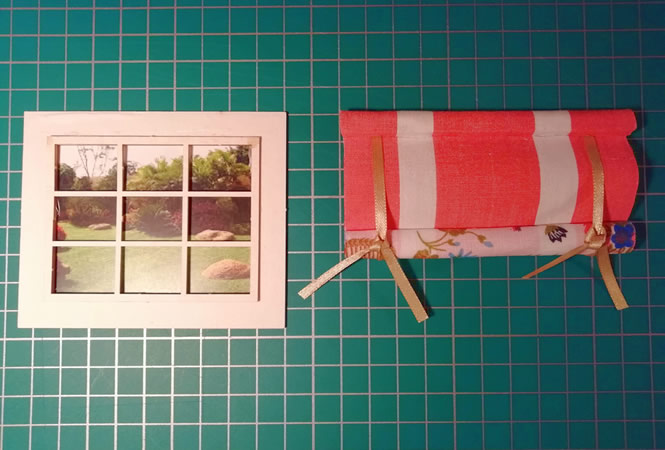
- the window that comes in the bathroom kit
- a ruler
- a ballpoint
- scissors
- white glue
- a brush.
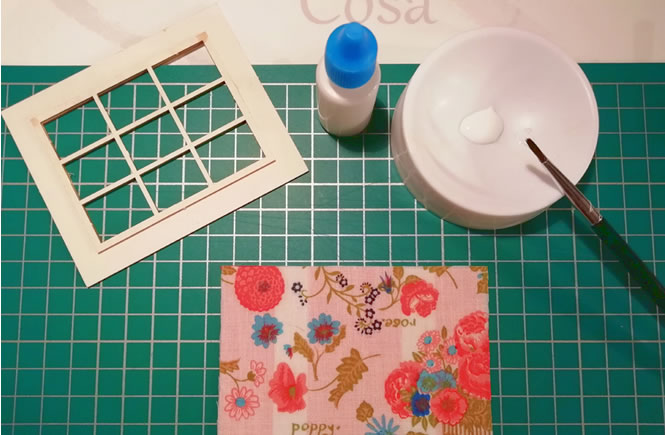
How do we begin to make the curtain?
We begin by marking the size of the window on the back of the two fabrics with a ballpoint, leaving 2 mm more, on each side. We cut a strip of foam sheet and cord to the same extent as the width of the window. Cut the foam sheet a little wider than the cord.
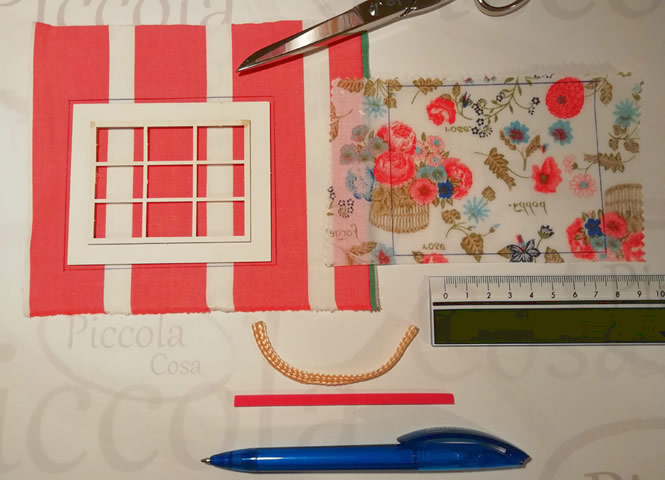
Glue the flat cord to the strip of foam and cut the fabrics straight.
We join both fabrics on the reverse. The visible faces will be good.
The best choice to decorate the bathroom
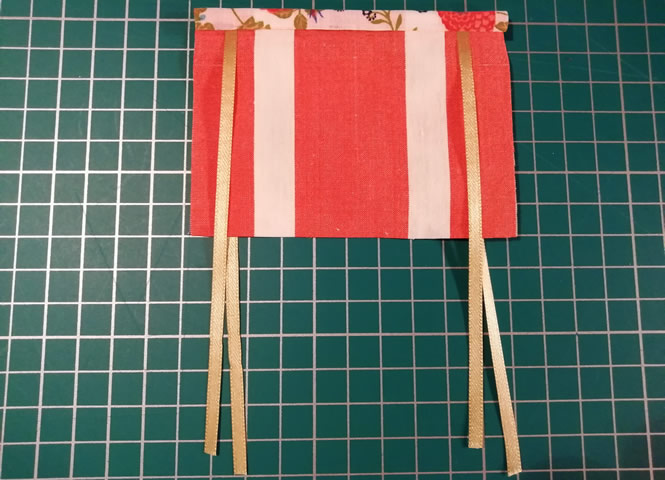
Now we must choose the fabric to which we want to give more visibility. In my case, as I need a color that contrasts with the decoration of the bathroom -soft tone and stamping- I choose the color of live salmon and white stripes. In the upper part of the fabric that you have chosen, we stick the strip of foam and the cord and to this we add two ribbons on both sides, distant from each other.
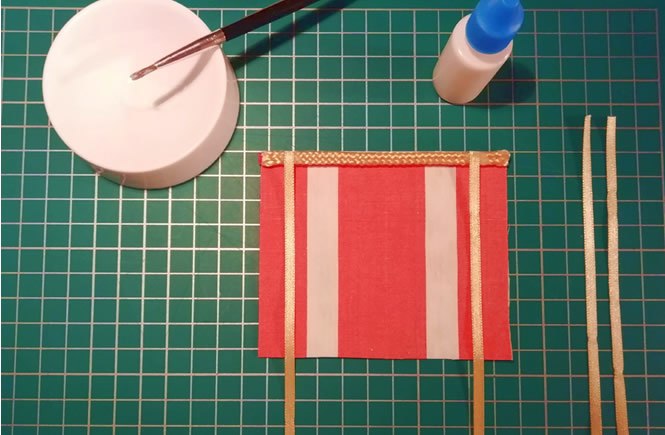
For the back, we do the same. The ribbon or narrow cord must be parallel to those in front and we stick them a little lower. For a better finish, we glue a strip of cloth on over the ribbon.
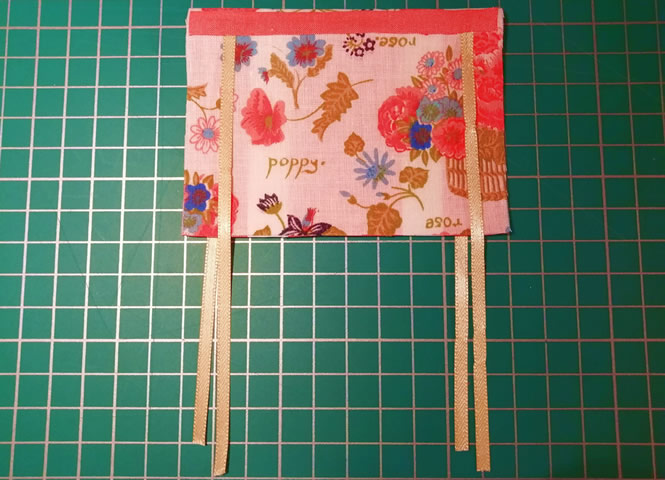
Once the four ribbons are joined together, we fold the top strip with the cord and roll it towards us, so that we see the fabric behind and cover the beginning of the ribbon or narrow cord.
The last details.
In this way the curtain would not look bad, but I preferred to add a piece of the same cloth. For this I have covered all the part already rolled and finally I have stuck it. The stamped of the fabric behind will be seen later, when will join the ribbons.
For this we will go rolling the bottom part of the fabric up. With one roll will be enough. It is now when we take the two ribbons and join them in a knot – without tightening – or a lace (if we choose a cord it will be easier to make a lace).
In this way the rolled curtain will hold up. In fact, … that’s how you put up the real ones!

The reason why I put the foam strip and the cord at the top, is to give more volume to the area where the ribbons come out.
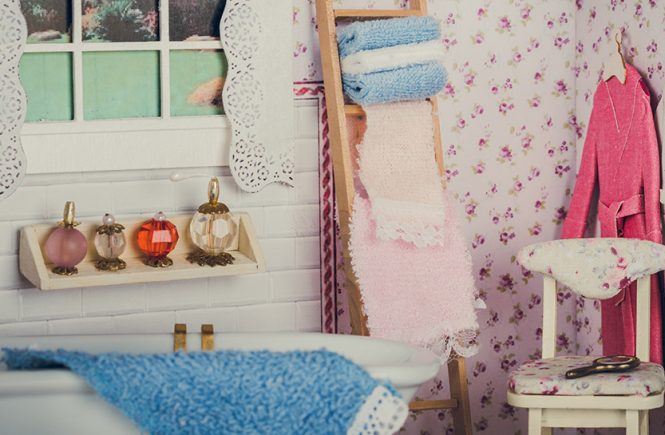
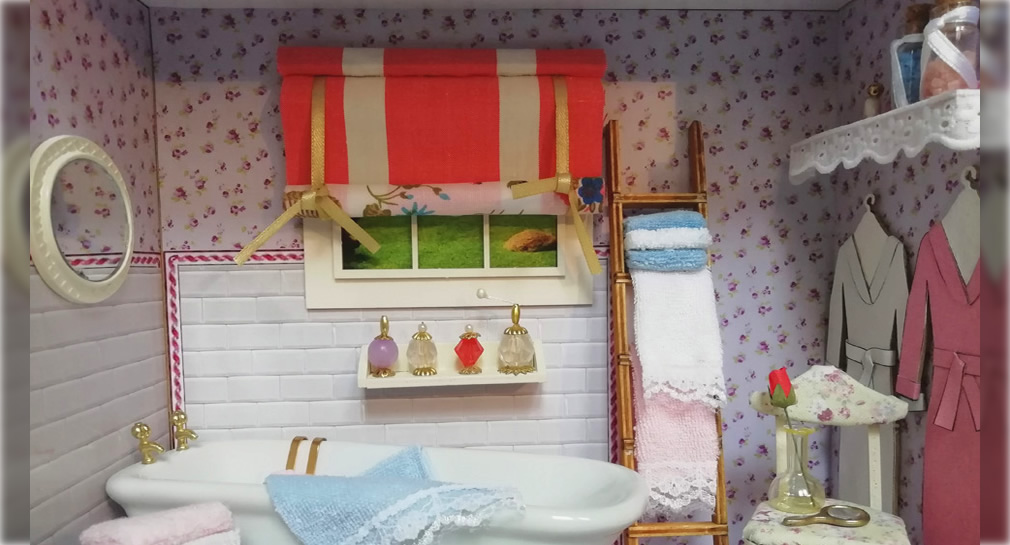
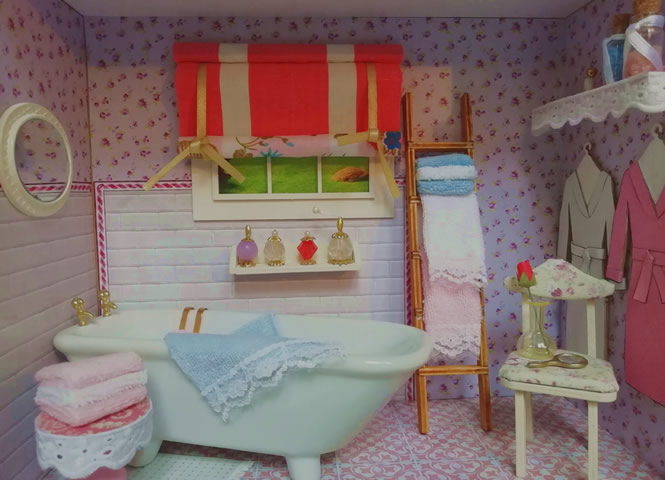
And that’s how it looks in my miniature bathroom!
Do you dare to change yours? Surely it will be very good for you. I would love to see it when you finish it and show it here. Send your photos to: hello@piccola-cosa.com. It is very interesting, curious and instructive to see the different likings and creativity of each person. That’s enriching and fun! See you soon!